This time with a handful of rules …

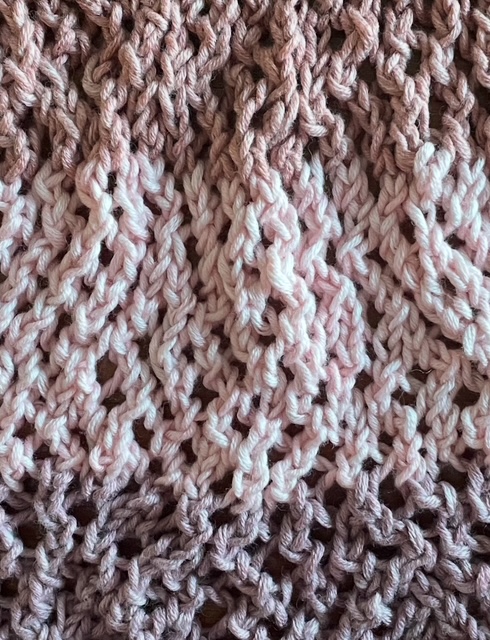
… about half done. A zig zag shawlette based on two variations of the cellular stitch. (367, p67) I’ve so far found five ways of doing the eyelet stitch and all have different-looking fabric.
In this knit the two I’ve used result in a strong rib-like pattern on the front, and two brioche-style textures on the back. The book, see below, calls it the cellular stitch.
3 mm knitting needles or knitting pins if that’s what you’re used to.
Same yarn as before, equivalent in thickness to 4 ply, a 40% bamboo-derived viscose and 60% cotton, which is very comfortable to knit despite the problems identified in Mark 1.
— — — —
I’m still using Mon Tricot’s very elderly knitting dictionary with 900 stitches and patterns. English translation and adaption by Margaret Hamilton-Hunt, Published in France, 1971.
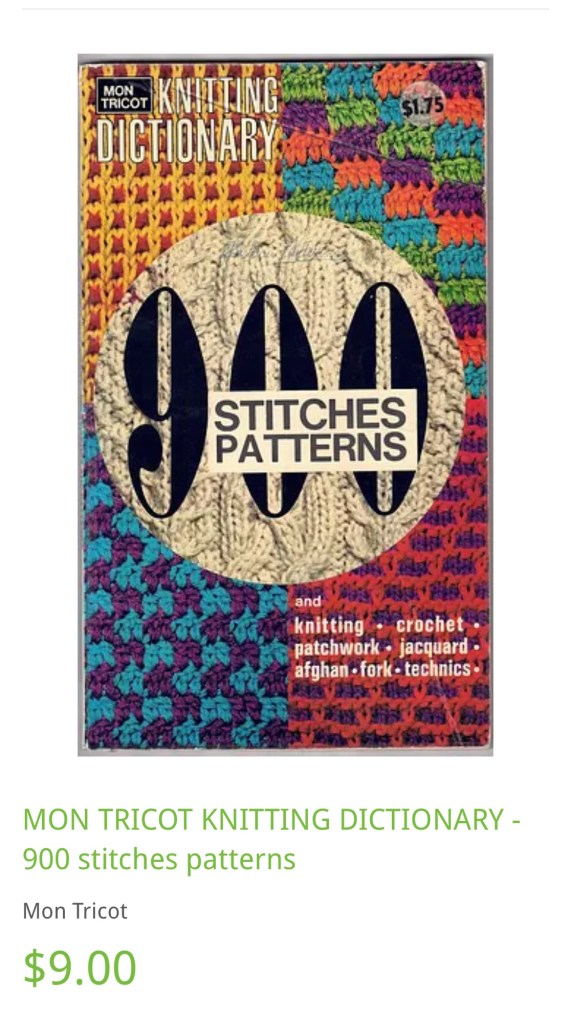
This for sale in the Oxfam shop in Adelaide … price hasn’t gone up much, whereas the copy on Etsy was $142.60!!! Guess that one was never used for its proper purpose.
Mine has the front cover being used as a bookmark.
But the first eyelet stitch I learned was well before 1972, probably round about 1962, knitting a little jumper for one of my sisters then aged about four …. “Wrap one to make one, purl two together” … Number 331 in the book on page 61.
— — — —
When my work (lol, in the present day) is sloping toward the right, all the action is on the back of the work. At the beginning of the row, knit two together purlwise, knit three plain, then wrap yarn to make one, and purl two together until the last four stitches, knit three plain and slip the last one purl-wise.
On the front of the work, make a stitch by purling first stitch and before pulling stitch from left needle, throw yarn back and finish with a plain stitch. There is probably a name for this process but I’ve never known it.
Though I discovered this way of increasing myself, I have no doubt that many other knitters also use it and that it has a name and set of instructions on how to achieve it.
Knit the rest of the line in plain, barring the last stitch which should be slipped purlwise.
Work as many rows as you have decided for your zig.
More to come on this as I haven’t even got you begun yet. Don’t despair.
— — — —
To begin, cast on three stitches. Knit eight rows always slipping the last stitch purl-wise, and doubling the stitch at the beginning of each row. You should have eleven stitches.
Now we start the pattern. Turn the first stitch into two using the same technique you’ve already been using, knit three stitches, *yarn over to make a stitch, knit two together purl-wise* repeat until last four stitches. Knit three, slip one purl-wise.
On the front side of the work, turn the first stitch into two, knit to the second last stitch and slip the last one purl-wise.
Proceed until you have a width that you like. From this point decide if you want a straight scarf or a zig zag.
If straight, continue increasing first stitch at front of work, and start decreasing at back of work—decrease by knitting first two stitches together purlwise which is easiest—every purl line.
I don’t like the yarn I’m using at the moment for a straight scarf. I like a more variegated colour-way. A straight scarf I’ll usually make longer than this zig zaggy one.
For the opposite of the zig—the zag— I need to knit to that place in my project before I can describe it.
And this is to come in Part Two. 😊