I loved reading this article right now when my cortex and lizard brain have been at odds with one another and I made the wrong decision about getting medical help for a cat scratch. And AI would’ve been no use whatever.
Am I mimetic or a stubborn fool? Anyway more on my adventures another time. There are such good ideas in here, I’ll be journalling them when I get home (from hospital).
Because the future is here already and when we have kids and grandkids we need to be able model these very important concepts.
An essay about agentic vs mimetic people, using your lizard brain, and why outsourcing your judgment to AI is a values problem before it’s a …
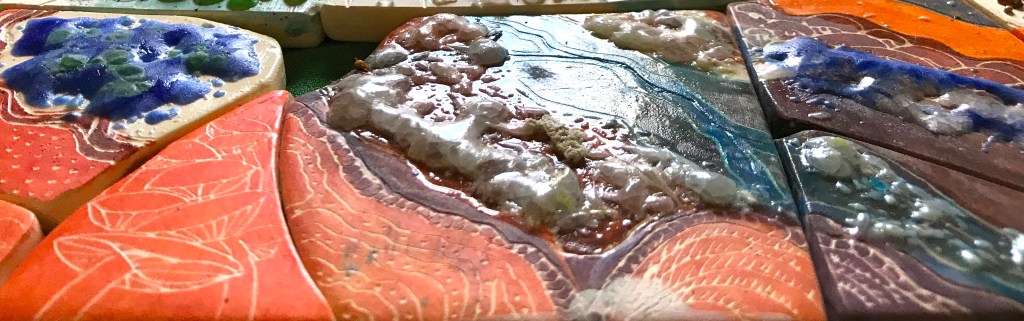
I’m pretty happy with this image, another cut from a ceramic puzzle I once made. The original 30 centimeter tile broke across during storage, a risk associated with green-ware. IE not yet kilned. I took the pieces home over the Christmas holidays to decide what I was going to do with it.
Ended up breaking them into 13 pieces to try a different experiment on each piece. In this photo are four of the pieces representing a creek. As well as incising them, and painting them with ceramic slips, I searched one of the local bottle dumps and found fragments of old blue and old white glass to crush. Kilning the glassy fragments made the foamy creek water featured on these pieces. Below them the pieces that were inscribed with creek bank vegetation and fungi.
Nothing to do with the new project, this set has been sitting around unopened for a couple of months.
I bought it originally because it looks like how I imagine the tiffanies in Earth Fall, thought i could maybe use it to illustrate various chapters.
Then opened the box and discovered the intricacy of the build. This will be one of those sets I’ll never take apart.
So last week had a surprise visit of the grandkids. The five year old went to the shelf and got down transparent bricks set she has been working her way through.
Leaving the almost eight year old a bit affronted, not being part of that far too easy a set for him. I said what about this one then? The supply lama that was.
He and his father built mightily and got to the end of bag three with the lama still just a forebody—very sturdy—and a box with open sides. Forgot to get that image.
After about a week of it sitting around, I thought I better start on it. Most of Bags 4 and 5 were the cladding. Struck me that I really had to trust the instruction booklet because most of the time I had no idea what I was putting together.
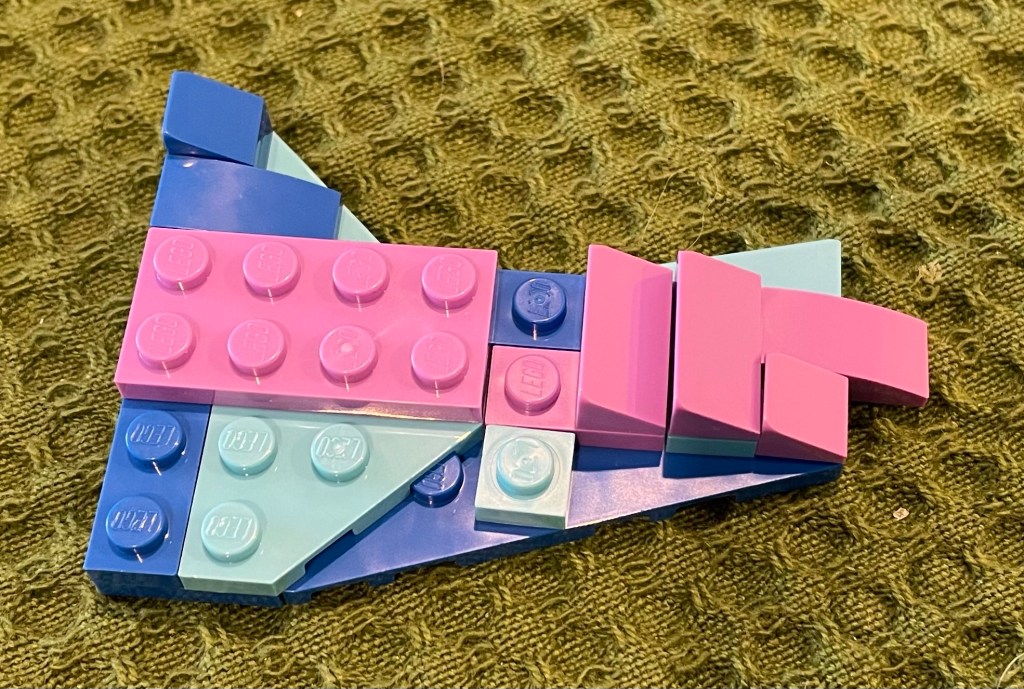
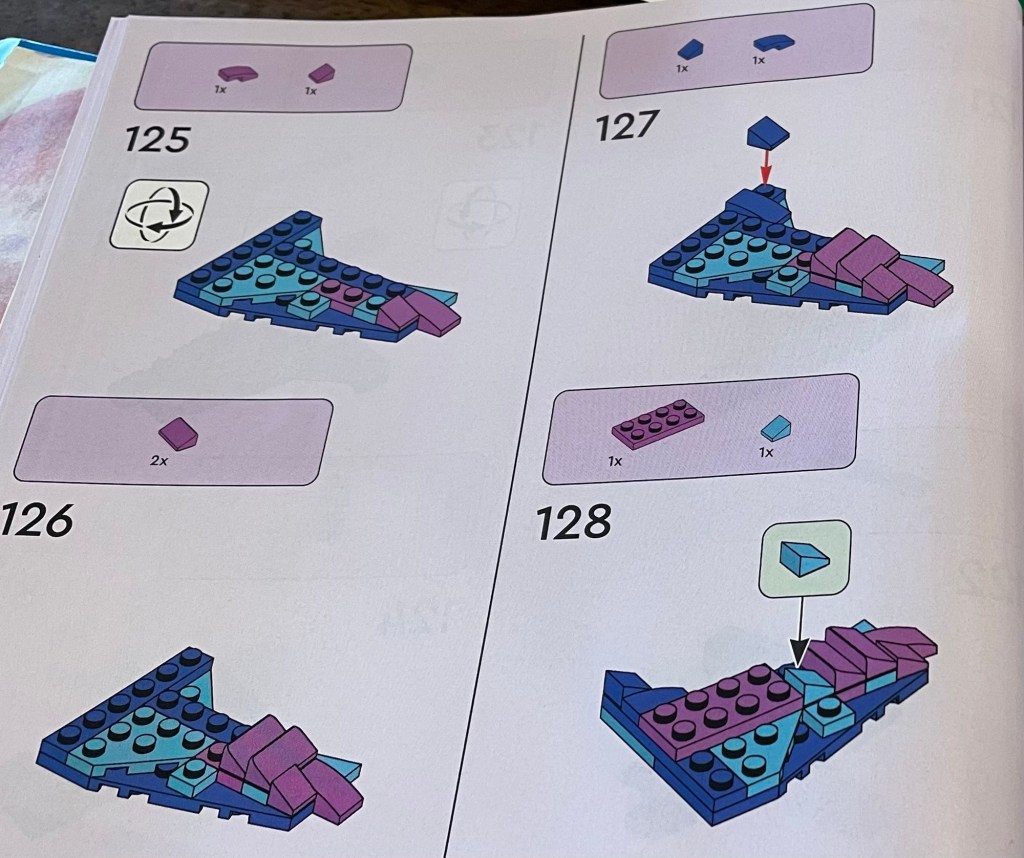
This for example …
Then the booklet gave me what the finished article should look like, and then where on the lama it should be installed.
A side neck piece, in case you’re wondering.
It wall be how to do the legs that I will be taking away with me, as they are quite elegant and I can see them on several other animals.
Constructing the head was fun, when you put the eyes on it suddenly has a character.
Moggy is a bit iffy about it. Like she’s saying, Do not come any nearer!
I haven’t put the Fortnite stickers on the hatches yet as I may still use the animal in a different story.
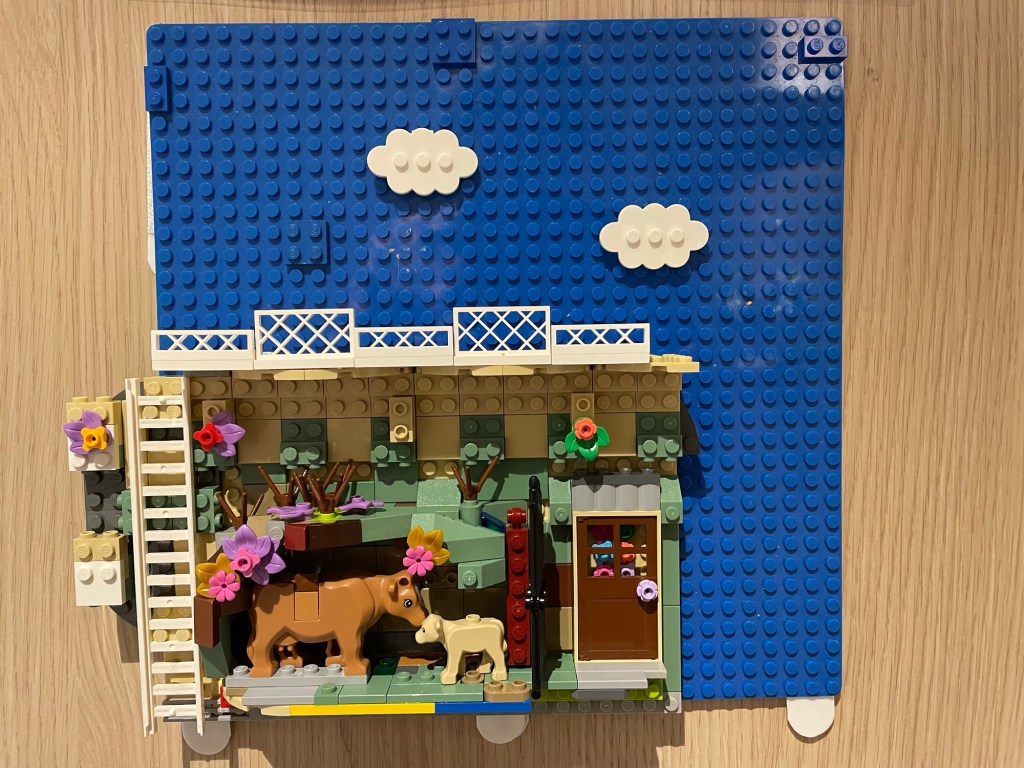
So far, anyway. Built three eighths of a 32 x 32 base plate and managed to fasten it to the pilaster beside my front door.
Four of the velcro type wall click-ons will together ‘carry’ four and a half kilos but I’m more worried about the Lego, This little scene is clicked to the blue background with three plates, all with between 8 to ten studs. Hopefully it will stay up. I’ll know tomorrow morning.
And then there are the four stud wide horizontals anchored only by a single row of studs at their inner edge. Have so far not weighed them down with too much, this is a test piece, after all.
If anything will give up, I’m betting on the base plate. They are such weak bits of plastic. I know, I know … I’m making this one do stuff it’s not designed for.
Using the third of my MILS plate designs did not work, scenes just too hard to install vertcally. I ended up having to take the whole base plate off the wall, and lay it flat, click the scene on, and re-join the velcro.
This is the kind of delivery van that Maeve drives, but then a purely mechanical model. Hers is definitely older and with more wear and tear seeing her roads are largely unmade country roads.
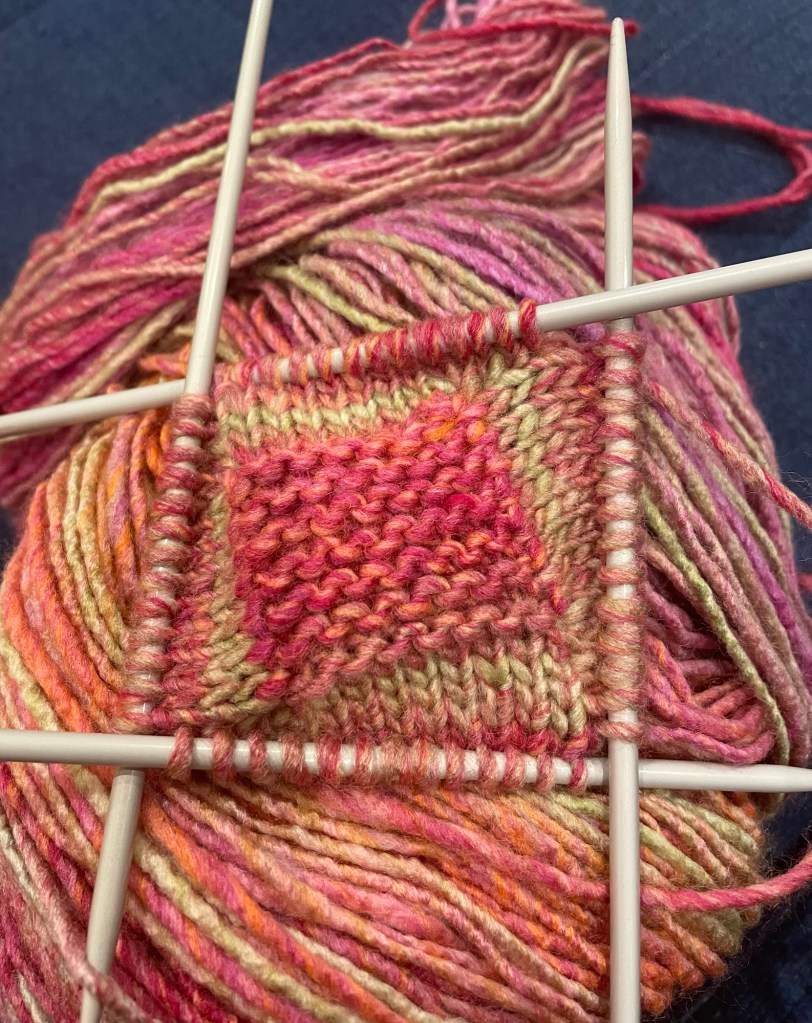
And the beginning of a new project. This little knit is a trial piece … can I knit a square by starting with a 4 cm centre and pick up stitches at each corner every round?
It’s working so far, though not yet looking particulrly tidy at the corners. I like how the patterning seems to be twisting. I haven’t worked out yet why it’s doing that.
When I imagined it the sides growing from the centre were straight. It’s possible that something totally different will eventuate if/when I knit a square all in purl. Wild times ahead.