Lego: Remote Controlled Tower Crane

Part One

Model (MOC) by Tim Scheiter from Rebrickable.com

Bosley & Co’s Point of View …

So, with the river levels rising … the cabins need to be raised, the cattle paddock raised or the cattle relocated, and stores to be got in by boat or helicopter. Bosley decided they would acquire a tower crane and that it would be a permanent fixture in the village.

Jackie’s crane mounted on Jed’s truck, transferred onto a remaindered railway dolly, turned into be a good helper-crane. Great at helping to transport tower crane parts from the barges, and great at raising them to where the construction was happening.

The Build From My Point of View …

Getting the parts probably was not the hardest part but certainly seems so with postage becoming the real spoke in the wheel, after five parcels from five different far-flung places. This is the thing about living in Australia. Vast internal distances and even larger external distances which all equal to pricey postage.

And I still don’t have all the parts I need and though it’s only a short list at the moment, its length will increase as I start to modify the original design.

Modifying Before I’ve even build it? …

Yes, unfortunately. As always, space is constrained. Second, a few videos of real-life lone tower cranes swaying and breaking up in high winds, convinced me that even the stability of a Technic crane might need bolstering by being connected to its builds.

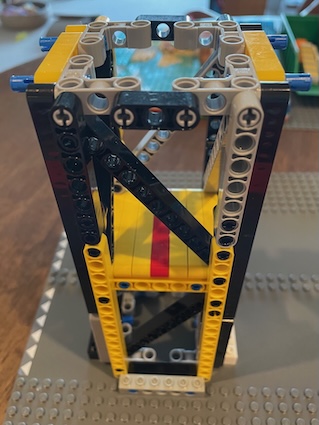
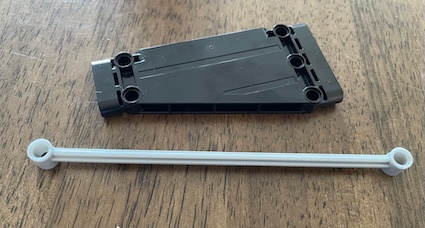
Beginning to make that happen, I found that I was using parts that will probably be needed elsewhere. The first really big problem I hit was a lack of two vital elements. Struts and panels. Just unable to get enough of either of them. I have only 5 of the panels, and 8 of the struts.


While I would’ve really enjoyed to build the whole thing without any hiccups, that was not to be. At this stage I thought I might be able to fix the tower on a base-plate with ordinary Lego pieces, support it that way.


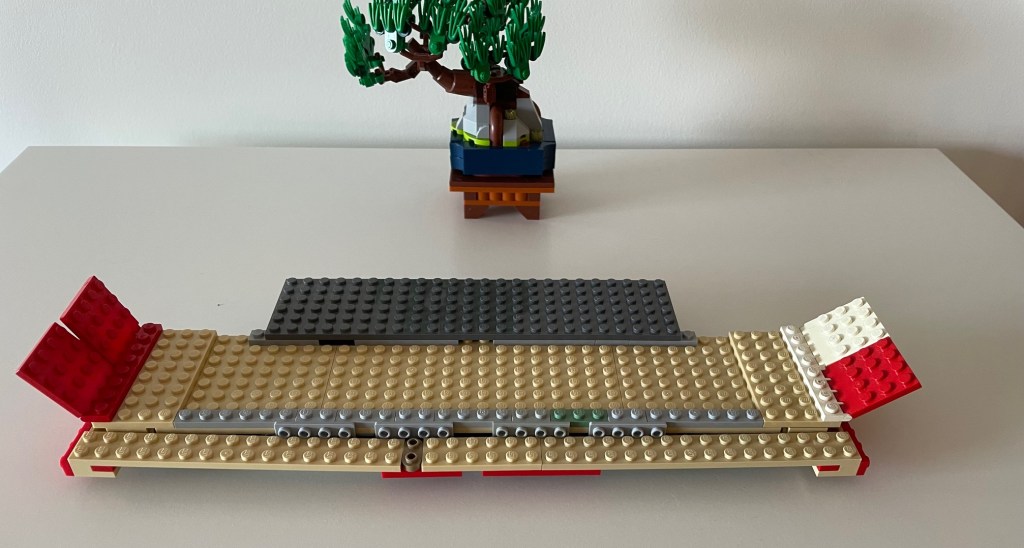
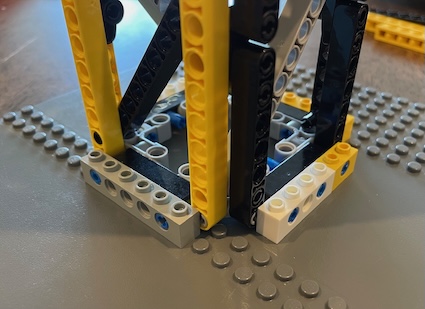
That idea turned into fixing the four-sided base of the tower to a Lego base-plate with the help of Technic bricks. Which worked very well on two opposite sides. These bricks lift the structure about 1 millimeter above the studs but because multiple pins on each side connect the two, there’s a strong and stable joint. Leaving me with the right number of strut-pieces for the jib/boom.

So what happened? While there are eleven studs between the first pair of two opposite sides—and there need to be—there are eleven-and-a-half studs between the second pair of opposite sides. I rebuilt the whole thing several times, tightened everything that could be tightened, but got the same result every time. By then quite frustrated.

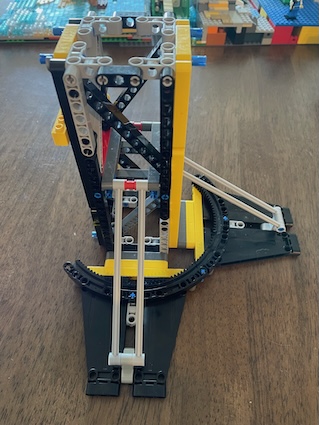
After a while remembered the ancient roads base-plate in my collection. This is the result. I’ve done away with the need for the second pair of opposite sides to be fastened to the base-plate. They are wedged pretty tight. In the photo below you can just about see the problem, the white brick does not line up with the studs.

That left a final concern. Without the struts-and-panels stabilization system the tower structure was so rickety that I was afraid that with more weight on it from another section of tower, a boom and trolley, the machinery in the middle, and the power and battery system on the other end, the tower would just twist and collapse. I inserted two panels made of 7 x 7-beams midway the stage.

These are probably overkill, since I will be fastening this stage to two fire escape blocks, part of the new village build. I put them in for peace of mind.


Bosley’s Builders, 2

Lunch at the site, pizza again …

OMG, do you see what I see? Just noticed the smiley faces on the studs of the base plate … they’re not Lego, of course. But we knew that, right? It’s the Hardware Store Build and that base-plate is on notice.

This installment is now live here, on Story-ing Bricks couldn’t change a few things, like the file name, and there being no author name, as if the installment appeared out of the ether … these items are part of the set-in-concrete nature of MSWord. Hopefully those will be fixed from now on.

Didn’t change the upside down order of posts. They should be easier to find with the blog-post re-titling. That’s a WordPress thing.

So I’m wondering whether if I organize a ‘cloud’ that’ll help with find-ability. Can but try, as the saying goes.

Old Safety Pins

Way way back when … when babies and toddlers wore cloth nappies (diapers to you in the north western hemisphere) safety pins were common.

The strong, well-made ones with the slide down safety caps ruled. Women regularly wore them pinned to their aprons while they bathed their babies.

Sometimes there was a cry through the house, where are the safety pins? For years and years, millions of nappies were safely safety-pinned around all the babies who wore nappies.

Yes, of course there were accidents, babies getting pricked. But not as often as disposable nappy manufacturers shouted about. There was a technique that you were taught in prenatal classes. You only stabbed your own fingers a few times until you learned.

Now we don’t have those particular accidents. But can you imagine the billions by now of disposable but not degradable diapers in landfills and oceans everywhere? And so there’ve been other, also frightening accidents.

Whales and other marine animals choking on soiled nappies thrown overboard a boat. Soiled nappies choking the gutters and causing floods.

Soiled nappies flushed down toilets, nappies dumped by the side of roads and wildlife trying to eat them. At least when my mother, who out of sheer frustration had to dump a full nappy in a train station’s rubbish bin, that nappy was made of biodegradable cotton.

I remember her mourning the necessity and the loss, sixty-eight years ago. The railway station in Genoa, Italy. The family, including the now four month old twins, were on their way back to Netherland after a year in Indonesia.

That up there is my collection of old safety pins. At least three are forty years old from the time when it was my turn to pin nappies on a baby. These pins still going strong. I wouldn’t like to be without them.

This little repair, for instance, does anybody ever replace tired elastic in jeans, pyjamas, etc? And how, if not with the help of safety pins?

Lego, Raft

Underside of hull …

This is the hull of Robbie Rafter’s new vessel. He will be meeting Boz … Boz in the rowboat in the shallow water, Robbie on the raft in the deep water … to discuss the forthcoming conditions.

This is the first time I’ve come to grips with Studs Not On Top (SNOT) bricks and angled plates in one of My Own Creations (moc). The problem here was the two hulls needing to be used upside down and connected to the deck plates which of course are set studs up.

Took me two and a half hours to produce the above and it is a fairly solid construction now. Although there are a couple of places where I may have used so-called illegal techniques, I was able to stabilize the area enough that elements aren’t falling off with handling.

The different colors on the underside speak of the same old same old. While I now have two IKEA Alexes and multiple little trays to store my whole parts collection in … I still don’t have enough of parts and colors to be able to construct even one color coordinated build. But never mind, the characters themselves are good at explaining away these little irregularities.

Top of as-yet-unbuilt-on hull … the dark grey platform will house the engine room, bridge, galley and the bunk room. The flaps at the ends are the gates/drive-on and off ramps. Similar to how a ferry works. The middle deck is for the cargo.

The walkway two studs wide on the near side, will allow Robby to save fuel and his propeller by ‘walking’ the boat through shallows … setting his pole in the mud and forcing the boat to move by walking in the opposite direction to where he’ll want to go.

Felting … Felt … Feeling

This glorious riot of autumn colours is a piece of felt that I made in a wet-felting workshop about 21 years ago and then began to embellish by embroidering with Exotic Lights silk embroidery yarn hand-dyed by Robyn Alexander for her Colourstream label.

Back then I worked part-time in the original Colourstream studio, packaging up orders of hand-dyed silk embroidery yarns and ribbons amongst other things. I look back with nostalgia on that time, the only paying job I was able to hold onto for a few years while struggling with ongoing ME/CFS.

I thank you always, Robyn, when I use the silks and handle the things I have made using them. I still love the embroidery silks, and use them exclusively when I sew where stitches will show.

Unfortunately, though, fine needlework has gone by the way a bit in the last five years due to neuropathy. Especially frustrating when I look at photos of various elderly relatives still doing fine embroidery into their eighties.

But you read that right. Twenty one years, plus or minus. I tend to keep textiles I’m emotionally attached to, however unfinished and or decrepit they may be. Where the feeling in the title comes in.

This piece of felt is in no way decrepit and though it’s been packed away for years, looks as good as new. At the time, I sewed it onto a canvas backing thinking to make a fancy cushion cover. That obviously didn’t happen. It would’ve been a waste as any cushion in my house puts in the hard yards.

But you know, a 40×40 cm almost-square like this isn’t much use other than as a cushion cover. Every few years I get it out, I have it hanging around for a while, and even maybe think up a new possible idea for doing something with it. At one stage I planned to make it into a wallet-type bag. I don’t know what happened. I must’ve got frustrated with the idea and packed the piece away again.