
Category: Other Media
Spoon Theory
In the ME/CFS arena it’s said that we have eight spoons of energy per day. And we do careful calculations so we don’t go over the eight because, woe betide me, going over means a week or more of resting and recovery.
Pacing is never going over your eight spoons per day.
Habits and routines are godsent, for they save me from having to make decisions. And decisions come at 12 and a quarter per spoon, if it’s true that we functionally have energy for only a hundred of the pesky blighters per day.
Habits and routines mean I am on automatic, doing stuff without consciously realizing it. Which can often work well. Though not today.
Today (Wednesday 10th) I sorted Lego in the morning. Used up eighty percent of decision making energy just deciding little things like which drawer, which container? More or less unconsciously.
This all, I am assuming now (Thursday 11th) so that I wouldn’t have any energy to do my usual wishy-washy, will I—won’t I, and just go … see Centrelink, and in the usual way fail to solve the problem due to not thinking it through before starting out.
Which is exactly what happened. I had about a quarter of the paperwork needed, and the operator organized me another appointment tomorrow (Friday 12) for an in-depth thing when they will put me through the wringer.
Own fault, though my good excuse is that I was, it turned out, half sick. Today, Thursday 11, whole sick.

In the Biesboschen …
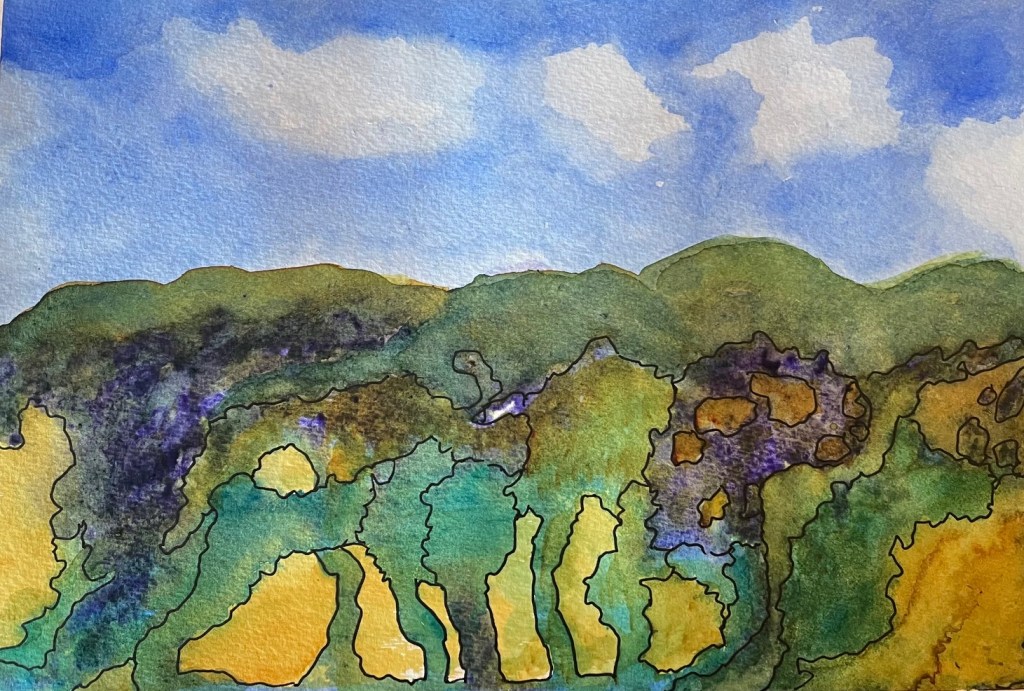
In the Biesboschen
Four hundred begettings ago,
Hunting, fishing and gathering
We people followed the narrow under-tree paths
of deer and swine.
Otter-Wijf might then have been my name.
Hung with bones, herbs and a wisert’s skin
I walked and walked and walked the cool under-tree paths
Of our home range.
— — — —
With this painting and poem I’ve tried to manifest a dream in which I had the clearest sensation that I walked through sand–making those little squeaks–in an ancient Dutch setting. Otter-wijf was my name and I wore a leather shoulder bag with dried herbs in it, and a leather wrap about my shoulders.
It was the uncanniest thing when I woke, no longer wearing the wrap or the bag when only seconds before they felt as real, as the bed-sheets a few seconds later.
Lego: On the Wall
After a lot of thinking and a couple of trials, decided that pieces of base plate would work better than a whole base plate. A pair of kitchen scissors did the trick.

Pieces had to be three by seven studs to fit the velcro fastener.
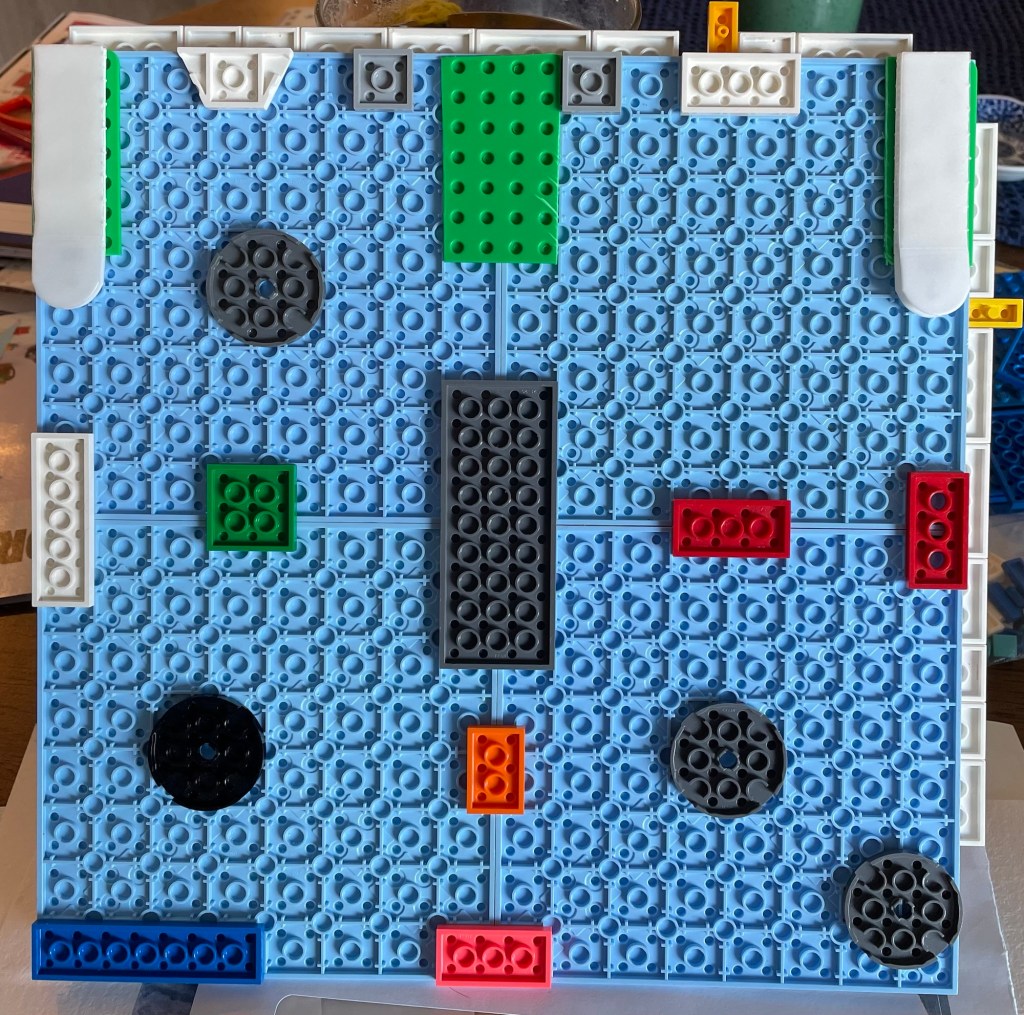
These four 16 x 16 plates connected by various other plates make up the base for the first part of the scene I’m intending to display outside my unit door.
Of the three bits of green base plate at the top, only the outside two have the wall mounts. The middle one is me testing its joining capabilities. Two wall mounts together will hold 4.5 kilograms the packet tells me. Plenty for the purpose.
What I discovered a minute after I glued the velcro fasteners to the wall … the two fasteners—one gripping the other and the thickness of a bit of base plate—are nearer to two plates thick than one.
Meaning I’ll probably need to add a two by one plate to the back of all the joiner plates, for the scene to hang straight against the wall. That’s my next thing to do.

He’s got the boat stuck on a sandbank, right?
Lego: The Supply Lama
Nothing to do with the new project, this set has been sitting around unopened for a couple of months.
I bought it originally because it looks like how I imagine the tiffanies in Earth Fall, thought i could maybe use it to illustrate various chapters.
Then opened the box and discovered the intricacy of the build. This will be one of those sets I’ll never take apart.
So last week had a surprise visit of the grandkids. The five year old went to the shelf and got down transparent bricks set she has been working her way through.
Leaving the almost eight year old a bit affronted, not being part of that far too easy a set for him. I said what about this one then? The supply lama that was.
He and his father built mightily and got to the end of bag three with the lama still just a forebody—very sturdy—and a box with open sides. Forgot to get that image.
After about a week of it sitting around, I thought I better start on it. Most of Bags 4 and 5 were the cladding. Struck me that I really had to trust the instruction booklet because most of the time I had no idea what I was putting together.
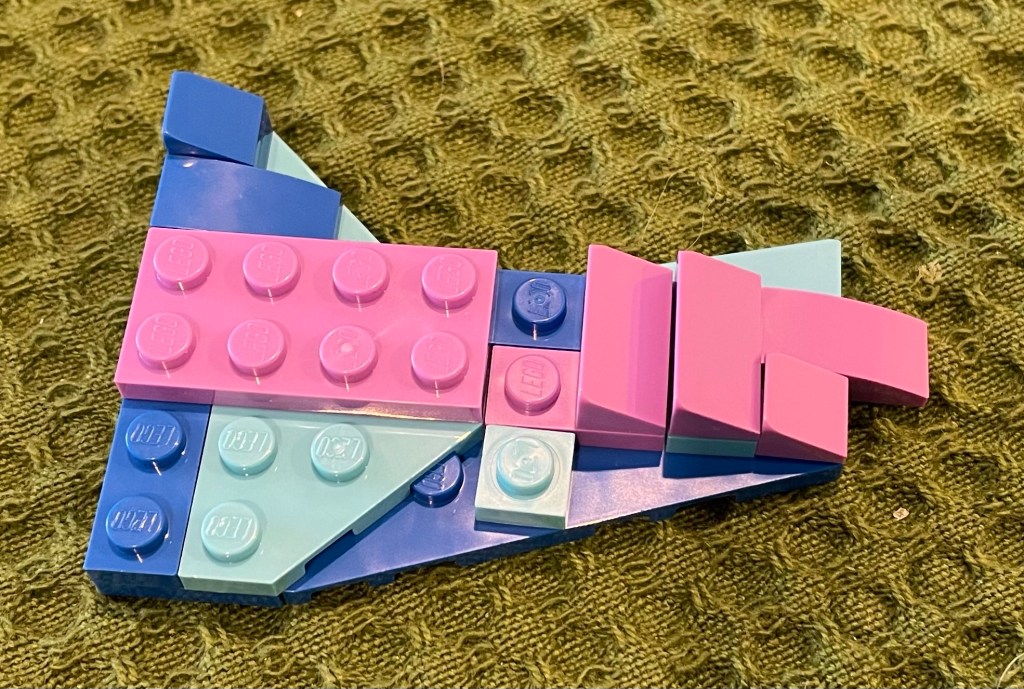
This for example …
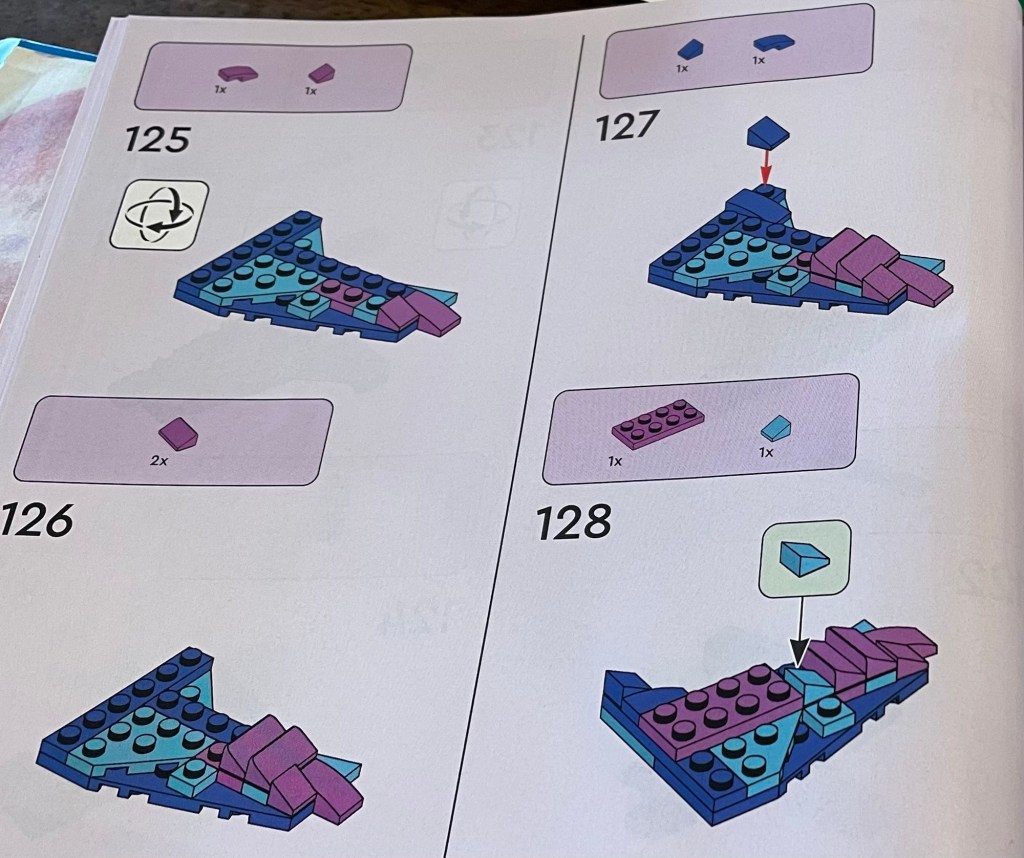
Then the booklet gave me what the finished article should look like, and then where on the lama it should be installed.

A side neck piece, in case you’re wondering.
It wall be how to do the legs that I will be taking away with me, as they are quite elegant and I can see them on several other animals.

Constructing the head was fun, when you put the eyes on it suddenly has a character.

Moggy is a bit iffy about it. Like she’s saying, Do not come any nearer!
I haven’t put the Fortnite stickers on the hatches yet as I may still use the animal in a different story.
Lego: New Project

I’ve started populating this map as you can see in the top left hand corner … where I’ve displayed the actual plate with its subject—the sun—and its place on the map.
Next for the plate, is waiting for me to make decisions about base plates and fixing them to the wall. another post that will be, I haven’t worked it out yet.
The prospective map, still mostly blank, is cobbled together with my favourite sticky tape. I’m planning 32 panels, each a 16 x 16 plate.
The story that will accompany this endeavour is a couple of chapters behind as you’ll discover in coming weeks. Or not, if you’ve stepped out.
Lego: Success!
So far, anyway. Built three eighths of a 32 x 32 base plate and managed to fasten it to the pilaster beside my front door.
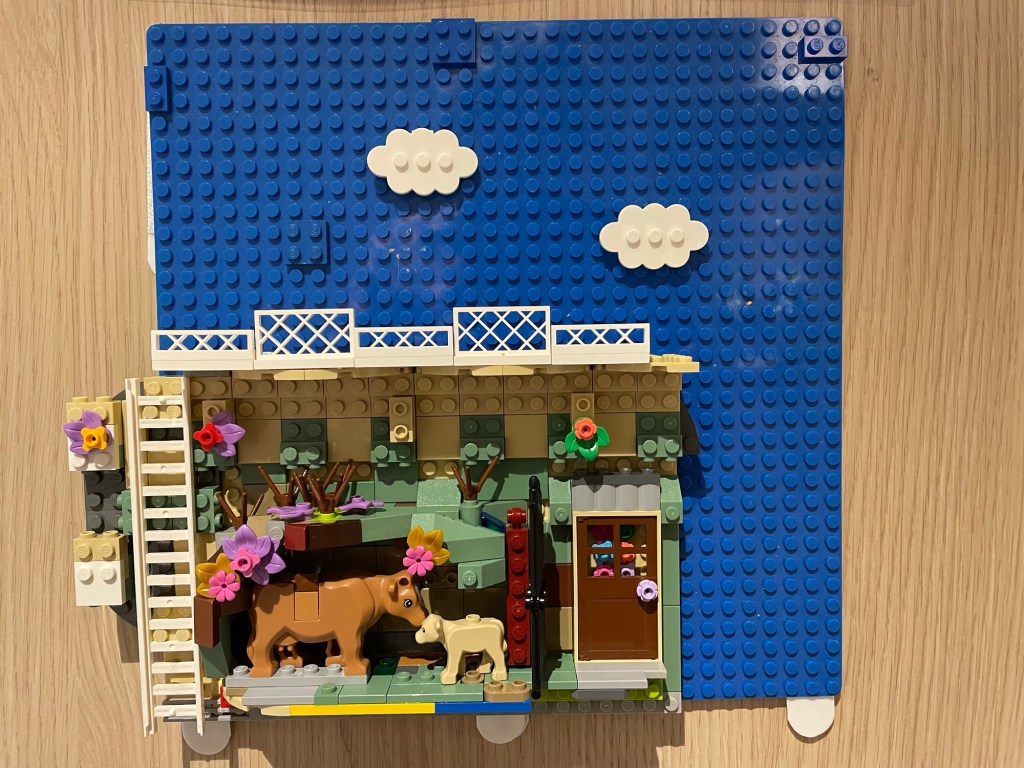
Four of the velcro type wall click-ons will together ‘carry’ four and a half kilos but I’m more worried about the Lego, This little scene is clicked to the blue background with three plates, all with between 8 to ten studs. Hopefully it will stay up. I’ll know tomorrow morning.
And then there are the four stud wide horizontals anchored only by a single row of studs at their inner edge. Have so far not weighed them down with too much, this is a test piece, after all.
If anything will give up, I’m betting on the base plate. They are such weak bits of plastic. I know, I know … I’m making this one do stuff it’s not designed for.
Using the third of my MILS plate designs did not work, scenes just too hard to install vertcally. I ended up having to take the whole base plate off the wall, and lay it flat, click the scene on, and re-join the velcro.
